(Edit: I'm not sure what on earth happened to this post, but it looks like I drafted it and forgot to hit the publish button back at the beginning of January. Only just noticed today when I started drafting another post. Oh well...that'll make it two posts in one day - most unlike me.)
This isn't a detailed battle report as such, but hopefully gives you an idea of the kind of games I've been playing recently using the rules from 'Napoleonic Wargaming' by Neil Thomas. I found them to be easy to learn (and remember!), fast-playing and good fun.
I use a 4 x 4' table and the prescribed 8 units per side, so it doesn't take long to set up a game, which in itself is a big plus and no doubt has led to me being able to get more games in.
I pretty much use the rules as is, but they are a very easy set of rules to modify if there's something you don't like.
For this game, the Prussians are taking on the French using the 1815 army lists. I randomly generated the terrain and the forces, and rolled dice to determine which side set up first and where. The French deployed first and were on the north side of the board. The Prussians deployed next, and I then allowed both sides a chance to make some limited redeployments. The French redeployed 3 units, but the Prussians failed to redeploy any. (In the book, Neil Thomas offers some ideas on how to deploy forces when playing solo, but I decided to use my own system for this game.)
French army:
2 x light infantry
3 x line infantry
1 x conscript line infantry
1 x field artillery
1 x cuirassiers
Prussian army:
4 x line infantry
2 x landwehr infantry
1 x jagers
1 x uhlans
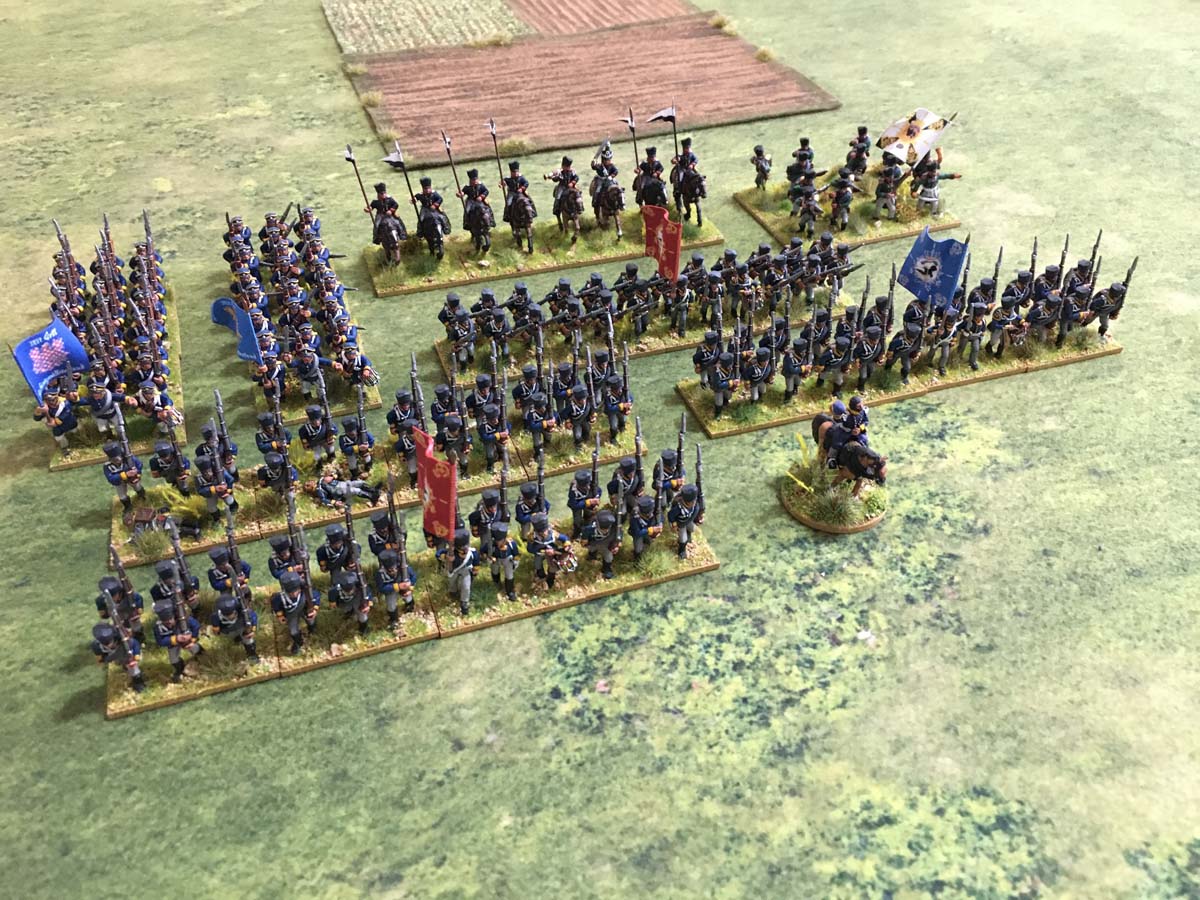
The finished set-up looked like this:
The French are deployed on the north edge of the board with a hill in their centre, a town on their left flank and a wooded area on their right. With such a strong defensive position, they would be letting the Prussians do the attacking. The plan was for the two light infantry units to hold the flanks while the line infantry and artillery defended in the centre. The cuirassiers were originally held back in reserve, but I redeployed them to the right flank (just beyond the trees in the above photo) in order to counter the Prussian uhlans on that side.
The Prussian plan was to send the jagers and a unit of landwehr to capture the town, whilst the majority of the line units attacked the centre. On the left, the uhlans were hoping to outflank the French by skirting the woods whilst one of the line infantry battalions pushed through the woods to then fall on the French right. However, when the cuirassiers managed to redeploy opposite the uhlans, I knew there was very little chance the Prussian cavalry would be able to do much except try and keep the cuirassiers busy and away from the Prussian infantry for as long as possible.

In the early part of the game the Prussian infantry moved forward in attack columns and the uhlans fell back to try and avoid the cuirassiers. I use coloured tiddlywinks to keep track of casualties rather than remove bases. On the Prussian side, a green tiddlywink equals 1 hit; a yellow tiddlywink equals 1 base lost (on the French side I use blue and red tiddlywinks respectively). In the rules, units lose a base after taking 4 hits, and are destroyed after losing 4 bases. Additional bases can also be lost due to failed morale tests as a result of fire or close combat.
You can see that the Prussian army is already taking damage from French musketry and artillery. The French light infantry fire, which hits on a 5+, proved to be especially effective in this game.
After a few more turns a couple of the Prussians infantry units have deployed into line and started returning fire. The landwehr unit nearest in the above photo tried to storm the town but was repulsed by French light infantry. Out of shot, the uhlans are engaged by the French cuirassiers. They would eventually be caught and destroyed.
By about turn 6 or 7, things were already falling apart for the Prussians. One line infantry unit in the centre had been destroyed by French musket fire, and most of their units had lost at least one or two bases. The two line battalions on the left flank (including the one pushing through the woods) were down to 1 base each. The French light infantry in the woods had been falling back in front of the advancing Prussians but causing real damage each time they fired and then retreated. To make matters worse, the French cuirassiers had returned from chasing off the uhlans and were about to crash into the Prussian rear.
I decided to call an end to proceedings after turn 8. The above photo was the final position of the troops. The Prussian left flank and centre had collapsed, and their right flank was severely weakened. The French light infantry in the town had finally been forced out, but it was too little too late.
Of all the games I've played with these rules so far, this was by far the most one-sided, and the quickest. Most of the previous games lasted between 12 and 15 turns.
To be fair, the Prussians did have atrocious dice rolling, but I think their battle plan could have been better. I wasted a line unit in an ineffectual push through the woods, and on the right flank the fight for the town drew in both landwehr units and the jagers in the end. A better idea would have been to send the jagers into the woods, concentrate the line infantry in the centre, and then use the landwehr either to attack the town or ignore it altogether and reinforce the centre.
The uhlans were always going to lose against the cuirassiers. The combat matrix in the rules gives lancers 1 dice per base against heavy cavalry, but heavy cavalry receive 2 dice per base. If I were picking from the army list rather than randomly selecting the forces, I'd always consider a unit of dragoons for the Prussians for 1815 battles against the French.
The French battle plan was simple but sound. The artillery on the hill managed to wear down a couple of the Prussian units, but it might have been better employed in a more forward position in the main battle line. Both French light infantry units gave a sterling peformance, rolling an incredible number of fives and sixes on the dice for shooting. Likewise the line infantry units were very effective in their volleys, and the line never looked in danger of breaking.
I hope you found this short report interesting. If you're looking for a Napoleonic game that's easy to learn, quick to set up, and doesn't require a lot of space, then the Neil Thomas rules are a worthy choice. I've found a 4 x 4' table gives enough frontage for my 20mm figures, and more than enough depth. I could even increase the 8 units to 10 or 12 by deploying some units in reserve or keep them off table initially.
For future games I think I'll have a go at combining these rules with some of the scenarios from Neil Thomas' other book - One Hour Wargames.