Showing posts with label Battle report. Show all posts

Tuesday, June 27, 2023

Another game using Neil Thomas' Napoleonic Wargaming


This week I thought it was high time I gave my newly painted British units their first proper battle, so I set up the 6 x 4 table, laid down some terrain and, for ease and quickness, pulled Neil Thomas' Napoleonic Wargaming off the shelf to use for the occasion.

Not really a battle report as such, but I thought I'd share some of the photos and a few notes on how it all played out. It was an enjoyable few hours, and great to get the figures out for a decent sized game. I used 16 units per side (basically doubling the size of the game recommended by the rules, which works perfectly well), with the British joining forces with their Prussian, Brunswick and Hanoverian allies.

The French were assaulting a well defended position, trying to seize a town and the adjacent crossroads.

Apologies for the photos being a bit on the dull side. The lighting wasn't great in the room on the day. In case you're wondering, the red counters represent the number of bases a unit has lost. The other coloured counters represent hits. For every 4 hits a unit sustains, it loses a base. I use the counters to keep track rather than removing bases. I'll eventually make some casualty markers to use instead, which will look decidedly better.

The French begin their advance on the left towards the town and crossroads


The French right also prepares its advance 

Brunswicker, British and Hanoverian troops on the British right

As the game progressed, I fed in the first additional troops for the French: two more line battalions and two battalions of Imperial Guard

The French negotiate the fields in front of the town. Long range artillery fire has caused casualties among the Brunswick troops at the end of the woods

French battalions engaging the Prussians

French cavalry arriving on the road leading to the town

As the battle progressed, the French left suffered in front of the defenders' heavy musketry, eventually losing its first battalion. Feeling confident, the Brunswickers advanced out of the woods to engage a unit of French conscript infantry (a move they'd later regret)

Over on the right, things were hotting up with the arrival of more Prussians, including uhlans and a battery of foot artillery

Just as the French assault was faltering, their Polish allies made a timely arrival

The French conscripts routed the Brunswickers after a fierce exchange of volleys, while the Polish troops were getting ready to try and dislodge the British and Hanoverians from the town


French heavy light and heavy cavalry move further onto the battlefield. Chasseurs and cuirassiers peel off to help support the right flank attack...

...and eventually charge the Prussian uhlans in the flank (who have just routed a French line battalion)

The cuirassiers do the same to the Prussian landwehr, who had just finished off another French battalion with a bayonet charge

Fast forward a bit, and one Polish battalion has managed to drive out the British from the town area opposite them. However, more British troops arrive in the form of light dragoons, who would go on to lose a brief clash with French cuirassiers before retreating back down the road

Polish infantry capture one half of the town

As the day wore on, a French Imperial Guard column clashes with Prussian musketeers, destroying the already weakened unit and opening up a hole in the allied line

The Prussian landwehr ended up surviving two charges by the French cuirassiers and would remain on the field until the end. The uhlans on the other hand were eventually routed by the French chasseurs.

After 16 turns of play I decided to call a halt to the battle. Although the French had finally gained a foothold in the town, their infantry had sustained too many casualties to be able to fully capture the crossroads and the other built-up area. British heavy cavalry were also threatening to overrun the French foot artillery and outflank the French left

On the French right, their infantry had been almost completely routed, with only one weakened Imperial Guard battalion remaining. The cuirassiers and chasseurs faced a wall of Prussian infantry and artillery, so could do nothing more except retire


So, a hard day's battle for both sides but the field was still in the hands of the British and their allies by the end. It was always going to be a tough objective for the French given that I didn't give them any numerical advantage, but it was a fun game nonetheless. The final number of units routed was 6 for the French and 4 for the British/Prussian. If things had gone better for the French on their right flank, it would have been a different story, but the Prussians reinforcements sooner than the French ones did, which probably was the deciding factor in the end.


Friday, January 20, 2023

Napoleonic battle using Neil Thomas' rules

(Edit: I'm not sure what on earth happened to this post, but it looks like I drafted it and forgot to hit the publish button back at the beginning of January. Only just noticed today when I started drafting another post. Oh well...that'll make it two posts in one day - most unlike me.)

This isn't a detailed battle report as such, but hopefully gives you an idea of the kind of games I've been playing recently using the rules from 'Napoleonic Wargaming' by Neil Thomas. I found them to be easy to learn (and remember!), fast-playing and good fun.

I use a 4 x 4' table and the prescribed 8 units per side, so it doesn't take long to set up a game, which in itself is a big plus and no doubt has led to me being able to get more games in.

I pretty much use the rules as is, but they are a very easy set of rules to modify if there's something you don't like.

For this game, the Prussians are taking on the French using the 1815 army lists. I randomly generated the terrain and the forces, and rolled dice to determine which side set up first and where. The French deployed first and were on the north side of the board. The Prussians deployed next, and I then allowed both sides a chance to make some limited redeployments. The French redeployed 3 units, but the Prussians failed to redeploy any. (In the book, Neil Thomas offers some ideas on how to deploy forces when playing solo, but I decided to use my own system for this game.)

French army:

2 x light infantry
3 x line infantry
1 x conscript line infantry
1 x field artillery
1 x cuirassiers


Prussian army:

4 x line infantry
2 x landwehr infantry
1 x jagers
1 x uhlans


The finished set-up looked like this:

The French are deployed on the north edge of the board with a hill in their centre, a town on their left flank and a wooded area on their right. With such a strong defensive position, they would be letting the Prussians do the attacking. The plan was for the two light infantry units to hold the flanks while the line infantry and artillery defended in the centre. The cuirassiers were originally held back in reserve, but I redeployed them to the right flank (just beyond the trees in the above photo) in order to counter the Prussian uhlans on that side.

The Prussian plan was to send the jagers and a unit of landwehr to capture the town, whilst the majority of the line units attacked the centre. On the left, the uhlans were hoping to outflank the French by skirting the woods whilst one of the line infantry battalions pushed through the woods to then fall on the French right. However, when the cuirassiers managed to redeploy opposite the uhlans, I knew there was very little chance the Prussian cavalry would be able to do much except try and keep the cuirassiers busy and away from the Prussian infantry for as long as possible.

In the early part of the game the Prussian infantry moved forward in attack columns and the uhlans fell back to try and avoid the cuirassiers. I use coloured tiddlywinks to keep track of casualties rather than remove bases. On the Prussian side, a green tiddlywink equals 1 hit; a yellow tiddlywink equals 1 base lost (on the French side I use blue and red tiddlywinks respectively). In the rules, units lose a base after taking 4 hits, and are destroyed after losing 4 bases. Additional bases can also be lost due to failed morale tests as a result of fire or close combat.

You can see that the Prussian army is already taking damage from French musketry and artillery. The French light infantry fire, which hits on a 5+, proved to be especially effective in this game.

After a few more turns a couple of the Prussians infantry units have deployed into line and started returning fire. The landwehr unit nearest in the above photo tried to storm the town but was repulsed by French light infantry. Out of shot, the uhlans are engaged by the French cuirassiers. They would eventually be caught and destroyed.

By about turn 6 or 7, things were already falling apart for the Prussians. One line infantry unit in the centre had been destroyed by French musket fire, and most of their units had lost at least one or two bases. The two line battalions on the left flank (including the one pushing through the woods) were down to 1 base each. The French light infantry in the woods had been falling back in front of the advancing Prussians but causing real damage each time they fired and then retreated. To make matters worse, the French cuirassiers had returned from chasing off the uhlans and were about to crash into the Prussian rear.


I decided to call an end to proceedings after turn 8. The above photo was the final position of the troops. The Prussian left flank and centre had collapsed, and their right flank was severely weakened. The French light infantry in the town had finally been forced out, but it was too little too late.

Of all the games I've played with these rules so far, this was by far the most one-sided, and the quickest. Most of the previous games lasted between 12 and 15 turns.

To be fair, the Prussians did have atrocious dice rolling, but I think their battle plan could have been better. I wasted a line unit in an ineffectual push through the woods, and on the right flank the fight for the town drew in both landwehr units and the jagers in the end. A better idea would have been to send the jagers into the woods, concentrate the line infantry in the centre, and then use the landwehr either to attack the town or ignore it altogether and reinforce the centre.

The uhlans were always going to lose against the cuirassiers. The combat matrix in the rules gives lancers 1 dice per base against heavy cavalry, but heavy cavalry receive 2 dice per base. If I were picking from the army list rather than randomly selecting the forces, I'd always consider a unit of dragoons for the Prussians for 1815 battles against the French.

The French battle plan was simple but sound. The artillery on the hill managed to wear down a couple of the Prussian units, but it might have been better employed in a more forward position in the main battle line. Both French light infantry units gave a sterling peformance, rolling an incredible number of fives and sixes on the dice for shooting. Likewise the line infantry units were very effective in their volleys, and the line never looked in danger of breaking.

I hope you found this short report interesting. If you're looking for a Napoleonic game that's easy to learn, quick to set up, and doesn't require a lot of space, then the Neil Thomas rules are a worthy choice. I've found a 4 x 4' table gives enough frontage for my 20mm figures, and more than enough depth. I could even increase the 8 units to 10 or 12 by deploying some units in reserve or keep them off table initially.

For future games I think I'll have a go at combining these rules with some of the scenarios from Neil Thomas' other book - One Hour Wargames.

Sunday, November 7, 2021

Shadow of the Eagles game - the final turns, 6 to 8

TURN 6

The Prussians again won the initiative. I should mention here that I wasn't using any of the rules for initiative bonuses in this game, just a straight d6 roll off, which the Prussians had now won six times in a row!

In SotE, any required command checks are done at the start of each side's movement phase, and once more the Prussian landwehr cavalry on the far left failed its roll and would do nothing this turn.

The Prussian uhlans were within charge reach of the French chasseurs, so they decided to gallop forwards and keep the pressure up against the French on this side of the field. The chasseurs failed to counter-charge and would receive the uhlans at the halt (which actually turned out to be a blessing). There was no closing fire to conduct here (cavalry don't fire, and the uhlans were not with the arc of fire of the adjacent French horse artillery).

Prussian uhlans charge the French chasseurs a cheval

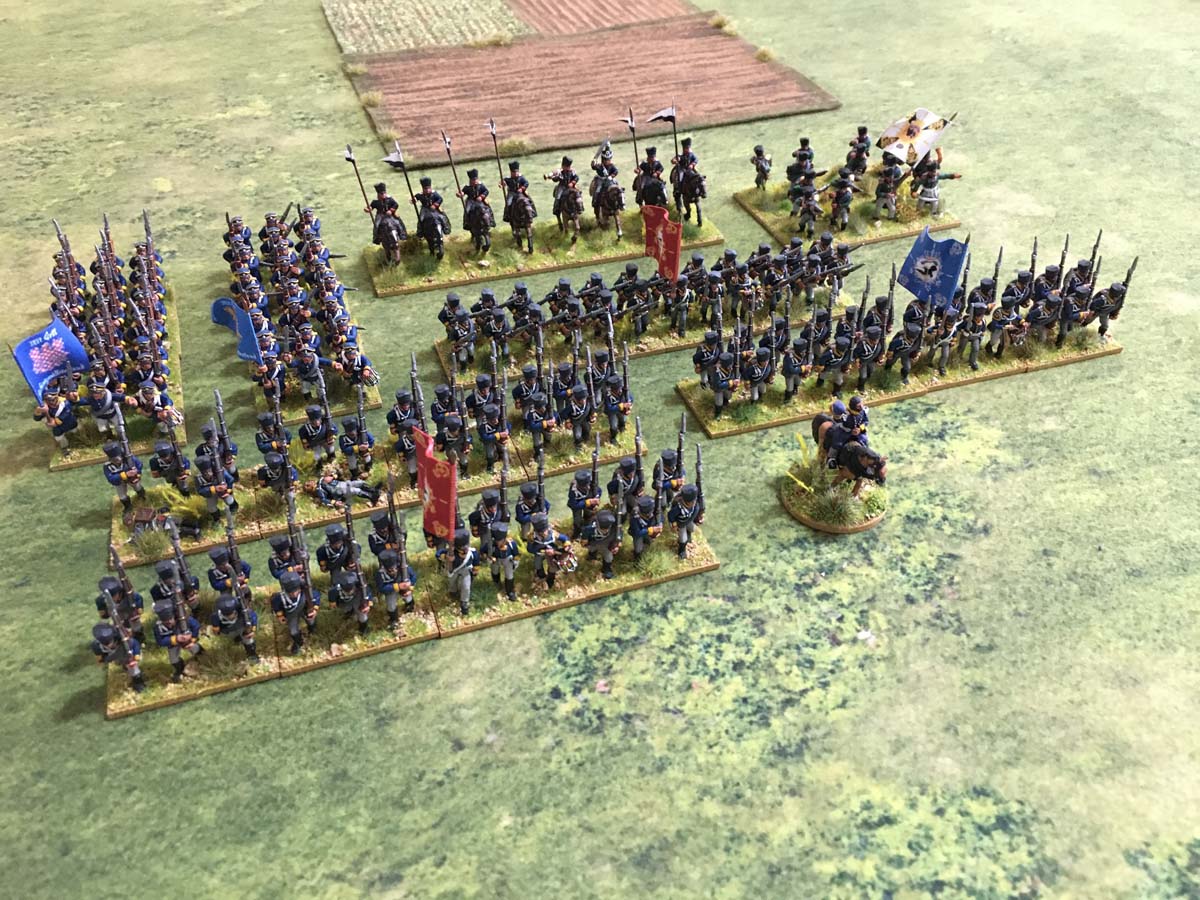
In the town, the Prussian army general, Wolff, brought his unit of line infantry further forwards, while outside the town the other infantry unit from Kraus's brigade reformed out of square and moved up to the edge of the built-up area.

The two infantry battalions from Kraus's brigade move up

In the French movement phase, the two remaining battalions of Boche's brigade resumed the fight for the town. CinC Dubois lead one column into the town, whilst the other charged across the stream to engage the Prussians. They received 1 hit from close fire as they rushed forward, but not enough to halt their charge.

The French re-enter the town

French army general Dubois bravely leads from the front

On the right-hand side of the battlefield, the French foot artillery limbered up and moved away from the approaching Prussians and Leroy's leading battalions shook themselves out into line. As the Prussians finally reached the the scene of the action, Major General Goode, having enjoyed taking the scenic route to the battle, saw the French up ahead and looked forward to soon getting down to the hard business of fighting.

Prussian infantry finally emerge from the woods to threaten the French left

Boche's foot artillery limber up and try to move to safety

During the firing phase, the left side of the battlefield was a busy place as both sides blazed away at one another. The French had brought forward it's flanking battalion in line, seeing as the Prussian landwehr weren't going to be a threat this turn.

Lots of firing on this side of the battlefield this turn

As the Prussian commander, I realised at this point I should have moved the injured hussars out of harm's way, but completely forgot, so they were directly in the line of fire of the French horse artillery. Luckily for them, they didn't take any hits. The Prussian landwehr unit in the middle, however, received one more hit, taking it up to 6 (perilously close to the rout number of 7).

In the combat phase, the fight between the uhlans and the chasseurs a cheval went the way of the French. The Prussians failed to cause any hits and received 3 in return. In hindsight, it was probably a poor decision to charge them in. For a start, they were in column (rather than in the more effective fighting formation of line), and the rough ground in front of the chasseurs meant that the Prussian's charge bonus was negated (so it was just as well for the French that they hadn't countered-charged). The uhlans fell back, weakened and on 5 hits. I chose not to pursue with the chasseurs.

Prussian uhlans fall back after their fight with the chasseurs a cheval

Meanwhile, during the crucial fight for the town, the Prussians showed their mettle and managed to cause 3 hits on the charging French whilst only receiving 1 hit in return. The French fell back, and the additional hit for falling back was enough to cause the unit to rout. The Prussians themselves were exhausted and didn't pursue.

Two turns of the battle remained, and another French line infantry unit had been destroyed.

TURN 7

With two turns to go, the battle was now at a critical point. The French finally won the initiative and moved first. Leroy's battalions moved further forward, but with the stream still to be crossed it was now apparent that the most they could do would be to hold off the Prussians infantry from Goode's brigade and provide some supporting fire against the Prussians in the town. It would be down to the single French battalion commanded by Dubois to try and maintain a French foothold in the town.

Leroy's battalions prepare to do what they can

The chasseurs a cheval wanted to charge the uhlans, and even though they were allowed to charge through their horse artillery in front of them, the difficult ground meant the distance was too great, so they changed into column instead.

A view from behind the French left and centre

During the Prussian movement phase, the landwehr cavalry finally managed to pass its command roll and declared a charge against the French line battalion to their front. The French hastily formed square and inflicted 1 hit on the Prussian horse as it bore down on them.

Landwehr cavalry finally organise themselves into a charge

Over at the town, Kraus led his reformed line battalion in a charge against Dubois' infantry, while Wolff's led the other battalion in line the edge of the town facing the stream, ready to fire on the French on the other side. Dubois' men were forced to fall back due to the Prussian closing fire, but the Prussians were unable to catch them during the pursuit.

View of the town from the French side as the Kraus leads in another Prussian battalion

Dubois' men are forced to fall back under Prussian charging fire

During the firing phase, the Prussians came off best on their right flank, but faired much worse on their left, and both landwehr infantry had by now sustained lots of hits.

During the combat phase, things went from bad to worse for the Prussians on this side of the battlefield. The landwehr cavalry tried desperately to tear into the French square but eventually broke itself completely. It routed backwards, and its path of retreat caught the landwehr infantry behind it, causing that unit to also rout. This in turn caused the second landwehr unit (already on 6 hits) to rout. The entire Prussian left flank had disintegrated in a horrible cascade of hits!

The Prussian left flank just before it disappears

Above – a view of the Prussian left just before I removed the figures of those three landwehr units from the table.

And below – a view of the battlefield at the end of turn 7. The Prussian hussars are out of shot, having retreated backwards to avoid the possibility of any further damage from firing. The fight for this side of the battlefield was over, but overall victory would come down to the fight for the town in the next and final turn.

The battlefield at the end of turn 7

TURN 8

It really had come down to the final turn to find out who was going to win this battle. The Prussian left had collapsed, but it had at least done enough to keep the French on this side, and keep them away from the town. The town itself was where the battle would be won, and here the Prussians were in a good position.

The Prussians won the final initiative of the game and were quick to declare a charge against Dubios' French infantry, which was just clinging on inside.

Kraus' Prussian charge forward to drive the French from the town

The already weakened French couldn't stand against the charge. They took another hit from the Prussian musketry and the subsequent fall back move was enough to rout them altogether. Dubois, at least, survived the fight, but the loss of this unit caused further morale hits on the French line unit just outside town. 

In the firing phase, the Prussians caused further damage to this French unit – enough to sweep it away completely and take the limbered French foot artillery with it.

The Prussians win the firefight across the stream

The firing elsewhere on the battlefield didn't really matter much now, except that the very last shot of the game – the final Prussian cannon ball, in fact – delivered a cruel coup de grĂ¢ce against the French. Schrode's horse artillery managed to cause a hit on the distant French column which had its brigade commander attached. I rolled to check for leader casualty and down went Fournier.

The Prussian horse artillery opens up for the last time...

...and down goes Fournier.

And with that, the battle was over.

A quick check of the victory point totals showed the Prussians on 8 (3 for holding the town plus 5 French units destroyed). The French finished on 4 (which was the three landwehr units it destroyed plus the one battalion from Kraus' brigade).

(EDIT: I somehow managed to completely ignore the actual rules for the way victory is calculated, but I'm happy to say that the outcome would have been the same anyway. See my note in the next post!)

A view of the battlefield at the game's end

Another view.

And another.

Well, what a battle! I'll do another post soon to go over my concluding thoughts, but I will say now that I had great fun with these rules and this scenario. And as far as a solo gaming experience went, it was very satisfying, even though the rules themselves are not designed for solo play as such.

I'm really keen to play another game with SotE, and especially to give the skirmish rules a try, and possibly also to introduce some variety of troop quality. But I will stick to my original plan of playing the same scenario using Lasalle 2nd edition and comparing the two games.

I hope folks enjoyed this battle report. I know it can be quite difficult to get a grasp of what's going on with only snapshots and brief descriptions to go by, but hopefully there was enough there to give you some sense of how it all unfolded and a rough insight into how the rules worked. I hope, too, that I didn't make too many rule blunders. I don't think I did, but there are at least a couple of things I can think to mention in my next post.

Until then, happy gaming!