Friday, January 20, 2023

British 79th regiment of foot - Cameron Highlanders


At long last I got round to painting the first of what will probably be 3 units of Scottish Highlanders for my Napoleonic British collection - figures as usual by Newline Designs. I decided to paint the first lot as the 79th Cameron Highlanders, if for no other reason than because I like their green cuffs and facings.

My only previous attempt at painting tartan was on 10mm minis, so I wasn't sure how this would go, but I'm pretty happy with how they turned out. Doing some practice attempts first and following advice from other painters online certainly helped.

The flags from Tiny Tin Troops really help to finish the unit off nicely.

The other two planned Highlander units are the Gordon Highlanders and the Black Watch. I'll look forward to adding those at some point, but will more than likely divert to other things first - namely, some cavalry and artillery. 3 units of British done in total now. Another 5 and I can have a game using the Neil Thomas rules.

Napoleonic battle using Neil Thomas' rules

(Edit: I'm not sure what on earth happened to this post, but it looks like I drafted it and forgot to hit the publish button back at the beginning of January. Only just noticed today when I started drafting another post. Oh well...that'll make it two posts in one day - most unlike me.)

This isn't a detailed battle report as such, but hopefully gives you an idea of the kind of games I've been playing recently using the rules from 'Napoleonic Wargaming' by Neil Thomas. I found them to be easy to learn (and remember!), fast-playing and good fun.

I use a 4 x 4' table and the prescribed 8 units per side, so it doesn't take long to set up a game, which in itself is a big plus and no doubt has led to me being able to get more games in.

I pretty much use the rules as is, but they are a very easy set of rules to modify if there's something you don't like.

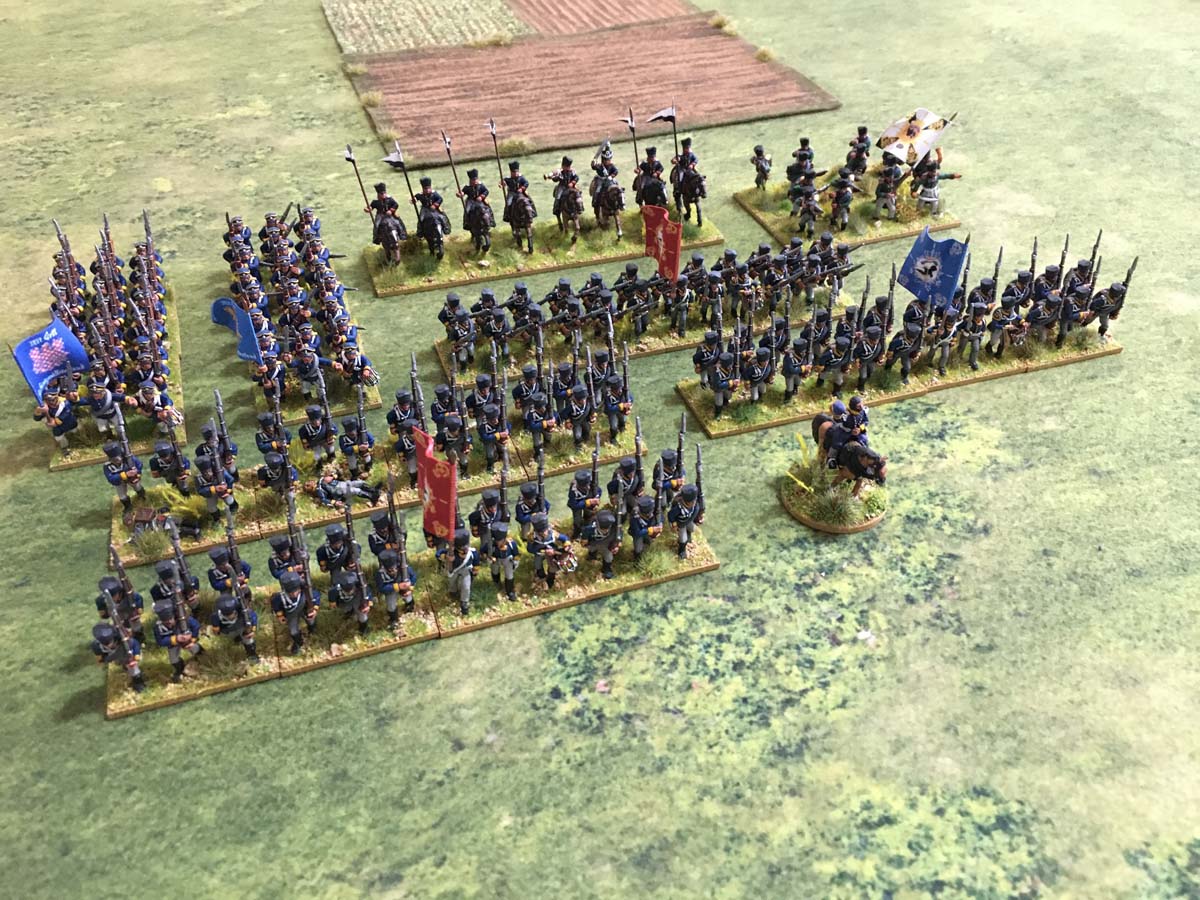
For this game, the Prussians are taking on the French using the 1815 army lists. I randomly generated the terrain and the forces, and rolled dice to determine which side set up first and where. The French deployed first and were on the north side of the board. The Prussians deployed next, and I then allowed both sides a chance to make some limited redeployments. The French redeployed 3 units, but the Prussians failed to redeploy any. (In the book, Neil Thomas offers some ideas on how to deploy forces when playing solo, but I decided to use my own system for this game.)

French army:

2 x light infantry
3 x line infantry
1 x conscript line infantry
1 x field artillery
1 x cuirassiers


Prussian army:

4 x line infantry
2 x landwehr infantry
1 x jagers
1 x uhlans


The finished set-up looked like this:

The French are deployed on the north edge of the board with a hill in their centre, a town on their left flank and a wooded area on their right. With such a strong defensive position, they would be letting the Prussians do the attacking. The plan was for the two light infantry units to hold the flanks while the line infantry and artillery defended in the centre. The cuirassiers were originally held back in reserve, but I redeployed them to the right flank (just beyond the trees in the above photo) in order to counter the Prussian uhlans on that side.

The Prussian plan was to send the jagers and a unit of landwehr to capture the town, whilst the majority of the line units attacked the centre. On the left, the uhlans were hoping to outflank the French by skirting the woods whilst one of the line infantry battalions pushed through the woods to then fall on the French right. However, when the cuirassiers managed to redeploy opposite the uhlans, I knew there was very little chance the Prussian cavalry would be able to do much except try and keep the cuirassiers busy and away from the Prussian infantry for as long as possible.

In the early part of the game the Prussian infantry moved forward in attack columns and the uhlans fell back to try and avoid the cuirassiers. I use coloured tiddlywinks to keep track of casualties rather than remove bases. On the Prussian side, a green tiddlywink equals 1 hit; a yellow tiddlywink equals 1 base lost (on the French side I use blue and red tiddlywinks respectively). In the rules, units lose a base after taking 4 hits, and are destroyed after losing 4 bases. Additional bases can also be lost due to failed morale tests as a result of fire or close combat.

You can see that the Prussian army is already taking damage from French musketry and artillery. The French light infantry fire, which hits on a 5+, proved to be especially effective in this game.

After a few more turns a couple of the Prussians infantry units have deployed into line and started returning fire. The landwehr unit nearest in the above photo tried to storm the town but was repulsed by French light infantry. Out of shot, the uhlans are engaged by the French cuirassiers. They would eventually be caught and destroyed.

By about turn 6 or 7, things were already falling apart for the Prussians. One line infantry unit in the centre had been destroyed by French musket fire, and most of their units had lost at least one or two bases. The two line battalions on the left flank (including the one pushing through the woods) were down to 1 base each. The French light infantry in the woods had been falling back in front of the advancing Prussians but causing real damage each time they fired and then retreated. To make matters worse, the French cuirassiers had returned from chasing off the uhlans and were about to crash into the Prussian rear.


I decided to call an end to proceedings after turn 8. The above photo was the final position of the troops. The Prussian left flank and centre had collapsed, and their right flank was severely weakened. The French light infantry in the town had finally been forced out, but it was too little too late.

Of all the games I've played with these rules so far, this was by far the most one-sided, and the quickest. Most of the previous games lasted between 12 and 15 turns.

To be fair, the Prussians did have atrocious dice rolling, but I think their battle plan could have been better. I wasted a line unit in an ineffectual push through the woods, and on the right flank the fight for the town drew in both landwehr units and the jagers in the end. A better idea would have been to send the jagers into the woods, concentrate the line infantry in the centre, and then use the landwehr either to attack the town or ignore it altogether and reinforce the centre.

The uhlans were always going to lose against the cuirassiers. The combat matrix in the rules gives lancers 1 dice per base against heavy cavalry, but heavy cavalry receive 2 dice per base. If I were picking from the army list rather than randomly selecting the forces, I'd always consider a unit of dragoons for the Prussians for 1815 battles against the French.

The French battle plan was simple but sound. The artillery on the hill managed to wear down a couple of the Prussian units, but it might have been better employed in a more forward position in the main battle line. Both French light infantry units gave a sterling peformance, rolling an incredible number of fives and sixes on the dice for shooting. Likewise the line infantry units were very effective in their volleys, and the line never looked in danger of breaking.

I hope you found this short report interesting. If you're looking for a Napoleonic game that's easy to learn, quick to set up, and doesn't require a lot of space, then the Neil Thomas rules are a worthy choice. I've found a 4 x 4' table gives enough frontage for my 20mm figures, and more than enough depth. I could even increase the 8 units to 10 or 12 by deploying some units in reserve or keep them off table initially.

For future games I think I'll have a go at combining these rules with some of the scenarios from Neil Thomas' other book - One Hour Wargames.

Saturday, December 24, 2022

British line infantry - The Royal Scots


A very quiet year on this blog but I will at least close out 2022 with one more post to show the latest unit to leave the paint desk - the 3rd battalion of the British 1st Regiment of Foot, The Royal Scots. Along with the 44th East Essex, I now have two units of British Napoleonics painted with a third (79th Cameron Highlanders) in progress.

The flags are by Tiny Tin Troops, which I'm going to use as much as possible from now on. I like the strong colours of the printing, so they stand out well on the tabletop.


I also got round to rebasing the 44th East Essex, which were still on the smaller 25x25mm bases (4 figs per base). The flags were replaced with ones from Tiny Tin Troops.


I can't remember why I never painted any flank company figures for the 44th. I must have been saving them for some other use, but I think I'll go back and add them at a later date.


Although I haven't posted or painted much lately, I have been enjoying quite a few games with my 20mm collection. Shadow of the Eagles has had a few enjoyable outings, but in particular I've been playing quite a lot of Neil Thomas' 'Napoleonic Wargaming'. The rules are very simple, and use only 8 units per side. There's no reason why you couldn't scale up to use 12 or 16 units per side, but so far I've stuck with 8 units, which fit well onto a smaller table - in my case 4' x 4'. I'll talk more about the rules and my games with them in the future.

2023 should see me posting more often here. I'll continue painting more British troops but also plan to add in some Prussian allies in the form of some Austrian and Russian troops. I'd like to add some Bavarians and Swiss troops for the French, too.

Hope you enjoy the photos. More to follow.

Saturday, June 25, 2022

Polish napoleonic line infantry - 13th and 4th regiments


It's been another a dry spell lately as far as painting goes, but for the past few weeks I've been working away on some Polish line infantry figures, which are now finally done. These are painted as the 13th and 4th regiments, the former of which had white jackets as opposed to the normal blue. Finding good reference materials for the uniforms wasn't easy, so there are no doubt a few errors in the details.

Newline Designs only have a small selection of Polish troops in their Napoleonic range, but enough to allow me to add some variety to my French army. I have two more units to paint, which I'll get round to at some point.

The flags used are made by Tiny Tin Troops, and are from their 22mm range. It's the first time I've used TTT flags, and I'm very pleased with the quality. They're perhaps slightly larger than what I'd normally use, but not enough to matter. I'm planning to use TTT flags from now on, and may go back and replace some of my older flags with TTT ones on certain units.

Wednesday, March 23, 2022

A spot of painting


A pretty quiet first few months of the year for me hobby-wise, so haven't had much to post about really. I did paint up these additional command figures for my Prussian and French armies, plus a few Portuguese cacadores just for the fun of it.

The French generals are Jerome (left) and Marcognet – part of the pack of French Waterloo generals that Newline Designs sells. I have a few others still to paint. The Prussian figures include a landwehr colonel, two generals and an ADC. At least, I think that's right (I'm never quite sure if the figure with the bicorne is an ADC or not!)

The cacadores were nice and quick to paint. I particularly like the kneeling figure, but they're all great sculpts.

I'm hoping to get another game to the table soon. It's been too long since my last one. Currently looking at some scenario ideas for Shadow of the Eagles, so I'll hopefully have something to share again soon.

Tuesday, January 4, 2022

Field of Battle - first game


Over the course of yesterday morning and the previous evening, I played through my first full game using the Field of Battle rules by Brent Oman. Now in their 3rd edition, the rules are an evolution of Piquet, a system originally written by Bob Jones. You don't need Piquet to play FoB; it's an entirely stand-alone game.

Field of Battle is structured around each side using a set of cards to dictate movement, combat and leadership. Play alternates from one side to the other depending on initiative rolls. The number of cards being turned also depends on the result of those initiative rolls, so there's an exciting and unpredictable flow to the game. Opposed dice rolls are used to resolve the action, with polyhedral dice being used instead of just the standard d6. For example, to conduct a melee I might be rolling a d10 for one side and a d8 for another. Any action modifiers will modify the dice type up or down, rather than the actual result rolled. It's a wonderfully simple and effective idea. To extend the example above, the side rolling a d8 might find itself being attacked in the flank, in which case it would have to roll a d6 instead of a d8.

Before getting stuck in, I did wonder if all the various situational dice modifiers would end up being too much for my brain to handle, but I'm happy to say this wasn't the case. Probably by around the half way point of the game, I'd managed to memorise most of them.

In short, I really like this system! Other people have said how much they enjoy Field of Battle (and other Piquet games) for solo play, and I have to agree. Although it is primarily intended for two or more players, the use of cards to drive everything makes it very solo-friendly.

My game, as always, was a Napoleonic battle between the French and the Prussians, and a real nail-biter it was too! Both sides had beaten each other down to zero Army Morale Points, which is the point at which an army is in danger of capitulating if its CinC fails a command roll on turning the appropriate card. In the end, it was the French who failed theirs first, so victory belonged to the Prussians, but it was only a marginal one.

I don't have a full battle report to present this time, but here are a few photos from the game, and a few comments along the way.

The battlefield was a farily simple one, selected from the 'Season of Battle' maps that are included in this latest edition of FoB. There's a single road running through a town, with large hills on either flank. In the photo above the game is well under way with the Prussians (nearest the camera) deployed in strength on their right flank. However, the French took control of the town first and managed to cling on to it all day.

The action at the other end of the table was more spread out, with Prussian and French cavalry duelling it out. The Prussians also had guns dug in on the hill here, which did cause some damage to the French cavalry but otherwise spent most of its time engaged in futile counter-battery fire.

Above: a view from the Prussian side as they try to storm the town. The small coloured labels are unit and command group identifiers. I used a roster to record unit stats and hits.

In the centre of the battlefield, outside the town, the Prussians took up a holding position. The two French command groups opposite them gradually moved closer, with the French guns eventually taking their toll.

On the right, the Prussian cavalry got the better of their French counterparts. Both units of French chasseurs were eventually either eliminated or routed from the field, but by the end of the battle the two French hussar units were still holding their own.

With the cavalry combat going the way of the Prussians, they decided to send the landwehr over to attack the French centre. This helped drive the French back a bit and gave the Prussian centre some breathing space.

By the end of the game, the French left was in danger of being overrun, but their first command group inside the town had rallied well and was proving difficult to shift. Along the top edge of the above picture, you can just make out two Prussian infantry units routing off the table. The Prussians did manage to fight their way into one of the town sections in the end, but never came close to knocking the French out entirely.

The action in the centre of the field ended up being a bloody affair for both sides. The above photos shows the landwher cavalry routing, not far from a lone French infantry unit that has punched through the Prussian lines. On their side, the French have one unit in rout, whilst their main artillery command had to redeploy further back after being badly damaged. At top-right, you can just make out one of the Prussian foot artillery units having turned round to fire on the remaining French cavalry (off screen)

For most of the game, the French were actually outnumbered. One of their command groups (containing four infantry units) was found to be delayed in arriving (part of the Season of Battle pre-game set-up process, which I decided to use even though this wasn't a linked battle). A series of horrible command rolls meant that by the time this command group finally reached the field, the battle was over (somebody's going to get the sack for sure!)

So, a very close-fought battle that easily could have gone either way. In my mind I think of it as one of those ones from history where both sides claimed victory.

A view of all the figures that took part in the game. (Still a few command figures to finish off.)

Field of Battle gets a definite thumbs-up from me. I'm looking forward to giving it another game, perhaps with slightly altered command groups. As far as table and figure sizes go, I found my 20mm collection worked quite well on my 6 x 4 feet table. I used the measurements in the rules at 75% of what's stated, with my units having a frontage of approximately 3 inches. There were six command groups on each side, with roughly four units per command group. I think my table could have accommodated at least a couple more command groups per army, so there's definitely scope to play a bigger battle if I wanted to.

A spot of painting next, I think. I'm planning to finish off some command figures for the French and Prussians, and then have a go at painting some limbers.

Wednesday, December 29, 2021

Portuguese line and Spanish light infantry


A busy end to the year meant no real time for gaming this month, but I'm hoping to at least get something set up and started before heading back to work in January.

I did, however, manage to get this unit of Portuguese line infantry done. It took longer than expected but was well worth the effort. I do like this earlier version of the Portuguese uniform with the barretina cap. For reference, I used a colour plate from the Blandford book of uniforms on the Peninsular War showing a sergeant of the 18th infantry.

A while back Sean from Newline Designs very kindly added some Spanish light infantry to one of my orders. It's taken me a while to get round to painting them, but here's how a few of them turned out. I'll get round to painting the rest of the unit at some point. The reference I used for these was a Gerry Embleton illustration from Martin Windrow's book, Military Dress of the Peninsular War - another excellent book of Napoleonic uniforms and well worth picking up. It shows a trooper from the Spanish 2nd light infantry regiment. I think it has to be among the most colourful infantry uniforms from the whole war - making them look a bit like dismounted hussars. Very impressive! 

I'm not entirely sure what my next game will be. I had intended to give Lasalle 2 a try out, then thought about doing another Shadow of the Eagles game. Now I'm thinking of having a go at Field of Battle (now in its 3rd edition) after buying the PDF the other day. I'll just have to see where my enthusiasm takes me. I'm particularly interested in seeing how Field of Battle works as a choice for solo gaming. I've read lots of good things from others who enjoy it especially for this reason. There's also a campaign system included in the new edition called 'Season of Battle', which looks like it would be quite enjoyable for linking games in a meaningful way without much additional effort.

So, I'll see what happens between this blog post and the next post.